How to take a screenshot with your Samsung Galaxy

Whether you’ve just hit a new high score in a game or need to save a crucial document, taking a screenshot on your Galaxy phone or tablet is a simple task. While the exact method might differ slightly based on the model of your device, the feature is designed with convenience in mind, making it easy to capture what’s on your screen.
Notes:
- Information provided is specific to mobile devices sold in Canada.
- Screen availability and settings may vary by wireless service provider, software version and model.
- Some apps or screens may block screenshots due to privacy or security concerns.
For all Galaxy devices, taking a screenshot is usually done by using the Power and Volume down buttons. You can find the Volume button on the left side and the Power (or Side) button on the right side of your device, although their placement might vary slightly between models. To capture a screenshot, press and release both buttons at the same time. You'll know the screenshot has been successfully taken when you see the screen flash. The image will then be automatically saved in your Gallery.
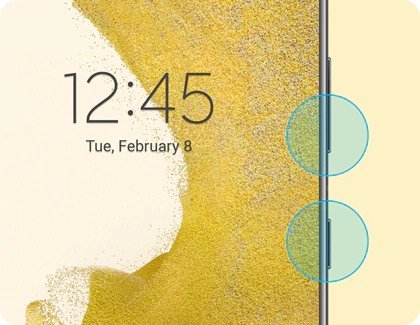
Note: For mobile devices equipped with a physical Home button, press the Power and Home buttons together to take a screenshot.
This gesture-based method lets you take a screenshot by simply swiping the edge of your hand across the screen from one side to the other. A screen flash indicates that the screenshot has been successfully captured. The image will then be automatically saved in your Gallery.
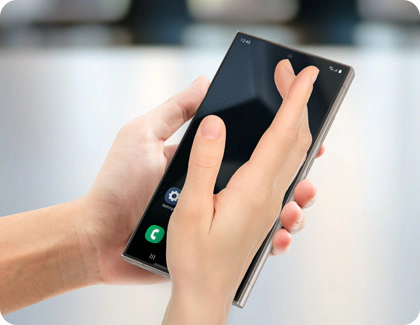
Notes:
- Activation check: The use of the “Palm swipe to capture” feature requires activation. Although this feature is typically enabled by default, it's advisable to double-check its status (as detailed in the following paragraph).
- Hardware compatibility: Due to hardware limitations, a few rare Samsung Galaxy models may not support the palm swipe gesture for capturing screenshots. Checking for the availability of the “Palm swipe to capture” feature is a reliable way to verify whether your device supports this gesture. If the feature is listed, your device is compatible.
If you want to verify whether your device supports the “Palm swipe to capture” gesture or need to activate this feature for use, follow these straightforward steps:
Note: Using this gesture-based method, you can easily capture a screenshot by swiping the edge of your hand from one side of the screen to the other. Once the gesture is completed, the screen will flash to indicate a successful capture. The screenshot will automatically be saved in your Gallery.
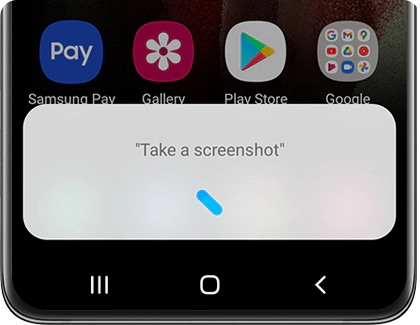
Utilize Bixby Voice or Google Assistant to take screenshots hands-free. Simply say “Hey Bixby, take a screenshot” when using Bixby, or “Hey Google, take a screenshot” when using Google Assistant. Bixby also supports chained commands, allowing you to capture and directly share screenshots to various apps and social media platforms.
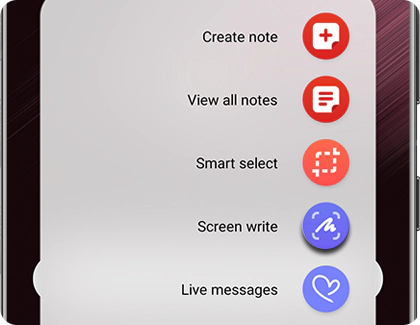
For devices equipped with an S Pen, taking a screenshot is a breeze with the Screen Write feature. Simply remove the S Pen, navigate to the screen you want to capture, and tap the Air command menu icon. Then, select Screen write. After capturing the screenshot, you have the option to edit it before saving.
The Tasks Edge panel on your Samsung Galaxy offers quick access to frequently used actions, including a handy “Take screenshot” shortcut. This tool allows you to capture your screen with a single tap, making it convenient to quickly save and share what's on your display.
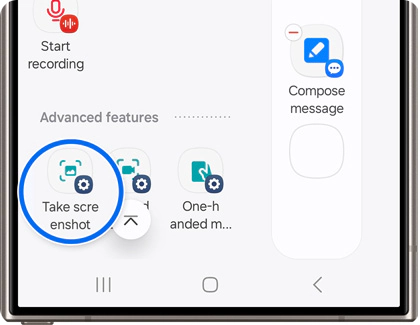
Note: The “Take screenshot” shortcut may already be added to your Tasks Edge panel by default.
Note: You can add up to 12 shortcuts to the Tasks Edge panel.
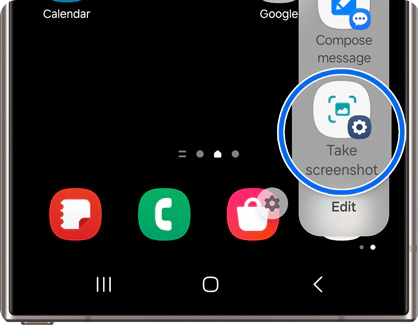
Note: The screenshot will automatically be saved in your Gallery.
If you need to capture more content than what's visible on one screen, such as a lengthy webpage or document, the Scroll capture feature is ideal. Start by taking a standard screenshot. Immediately after, you’ll see the Scroll capture icon, which looks like two downward arrows.
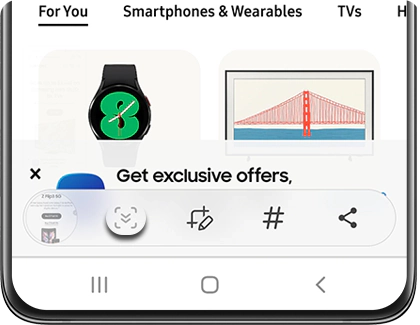
Tap this icon once to prepare for scrolling, and then continue tapping it to extend the screenshot. Keep tapping until you've captured all the necessary content, whether that’s until you reach the bottom of the page or to a specific point you wish to include.
Note: The Scroll capture icon will only appear if you are viewing content that extends beyond one screen, such as on large web pages, app screens, or images that require scrolling. Additionally, this feature may not be available on certain websites or apps.
Gallery
To access your screenshots, open the Gallery app and select the Albums tab. Then, navigate to the Screenshots folder. Choose the screenshot you want to share, tap the Share icon (depicted as three connected dots forming a less than symbol) at the bottom of the screen, and select your preferred sharing method.


My Files
You can also access your screenshots through the My Files app. Simply open the app, tap on Images, and then locate your desired screenshot. Select it, and then tap the Share icon at the bottom of the screen. From there, choose your preferred method of sharing.


After capturing a screenshot, you have the option to edit it immediately. Tap the Draw icon, represented by a pencil at the bottom of the screen. This allows you to draw on or crop the screenshot to your liking before saving it.
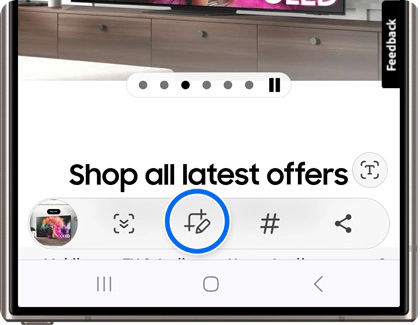
You can also add tags to your screenshots by tapping the Hashtag icon in the menu. Suggested tags will appear, allowing you to select one or create your own. After creating or selecting a tag, tap Save to confirm. To exit, simply tap anywhere outside of the menu bar.
Thank you for your feedback!
Please answer all questions.
The coding for Contact US > Call > View more function. And this text is only displayed on the editor page, please do not delet this component from Support Home. Thank you


