What lock methods can I use on my Samsung Galaxy device?
Samsung devices come with built in defence-grade security, ensuring that your data and device is secure from the moment it leaves the box. To make unlocking your phone easier, multiple lock methods are available, including fingerprint recognition, patterns and PINs.
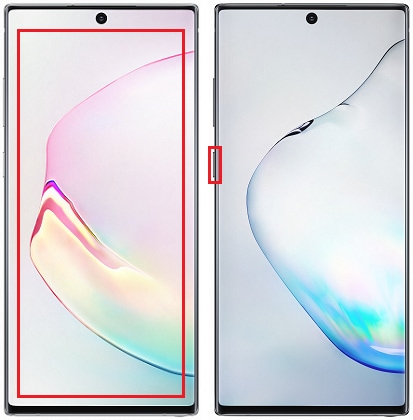
The range of available lock methods differs according to model. You can choose your preferred lock method from those supported on your device. If you are experiencing problems unlocking your device you can find more information here.
Where can I change my lock method?
The location of the lock screen settings will depend on the specific device you are using. On the latest devices you can find these settings at Settings > Lock screen > Screen lock type

On older devices you can find the lock screen settings at Settings > Lock screen and security OR Settings > Lock screen > Screen lock
The swipe unlock method sets your device to unlock with a swipe across the screen. This is the lowest level of security available and some features will be disabled as a result.
Some apps, such as banking apps, require greater security to function and biometric information such as fingerprint and face scans will be unavailable if this unlock method is selected.


1. Tap Swipe


2. When your device is locked, tap the screen


3. or press the power or side key


4. Swipe the screen in any direction to unlock your device
Setting your screen lock type as none means that you only have to tap on the screen or press the side or power key to unlock your device. This is the lowest level of security available and some features will be disabled as a result.
Some apps, such as banking apps, require greater security to function and biometric information such as fingerprint and face scans will be unavailable if this unlock method is selected.

Pattern unlock allows you to unlock your device by drawing a pattern onto the screen. The pattern is drawn by connecting a series of at least four dots on a 3X3 grid without lifting off the screen. Once a dot has been used once, it cannot be used again.
This security type offers medium protection and can be used alongside banking apps and biometric information.


1. Tap Pattern


2. Draw the unlock pattern that you want to use


3. Once you are happy with your pattern, tap Continue


4. Draw your pattern again to confirm it


5. Tap confirm
6. When your device is locked, tap the screen
7. or press the power or side key


8. Draw your pattern to unlock your device
With PIN unlock you can use a series of numbers to lock your device. This lock method requires you to use between 4 and 16 digits and depending on your specific PIN offers medium to high protection. PIN unlocks can be used alongisde mobile banking apps and biometric information.
Please note: it is not recommended to use the same digit multiple times or a series of ascending and descending numbers. For example, 0000 and 1234 offer low protection


1. Tap PIN


2. Enter the PIN that you want to use


3. When unlocking with a PIN, you can choose to confirm your PIN by tapping OK or have your device automatically unlock when it detects the correct PIN. Tap Confirm PIN without tapping OK to have your device automatically unlock


4. Tap Continue or Done to confirm


5. Enter your PIN again


6. If you selected Confirm PIN without tapping OK, your PIN will be set up. If not, tap OK or Done
7. When your device is locked, tap the screen
8. or press the power or side key


9. Enter your PIN


10. If you selected Confirm PIN without tapping OK, your device will unlock automatically. If not, tap OK
Password locks use a combination of characters to provide a high security lock for your device. Passwords must be between 4 and 16 characters and must contain at least one letter. You can choose to include symbols and numbers to make your password even more secure. Password locks can be used alongside mobile banking apps and biometric information.


1. Tap Password


2. Enter your password


3. If you would like to check what you have entered, tap the view icon


4. Tap Continue or Done


5. Enter your password again to confirm it


6. Tap OK or Done
7. When your device is locked, tap the screen
8. or press the power or side key


9. Enter your password


10. Tap the view icon to check your password


11. Tap Done to unlock your device
Fingerprint recognition uses the unique characteristics of your fingerprint to unlock your device. This method is both highly secure and highly convenient as you only need to hold your finger against your device to unlock it.
To use fingerprint recognition to unlock your device you will need to set up a backup lock method such as a PIN, pattern or password. This is for additional security and will be asked for in specific circumstances, such as when the device is restarted.
If you are having trouble unlocking your device with your fingerprint, find out how to troubleshoot this issue.


2. Tap Fingerprints


3. Place your finger on the sensor, then lift it off when you feel a vibration


4. Place your finger back on the sensor, then lift it off again when the device vibrates


5. Repeat this process, moving your fingerprint around slightly until prompted to Get a full scan. This will happen when your fingerprint is around 80% registered


6. Tap Continue


7. Place the edge of your fingertip on the sensor, removing it when the device vibrates


8. Repeat this process, moving your fingerprint around until your fingerprint is added


9. Tap Add to register another fingerprint


10. Tap Done to finish adding fingerprints
11. When your device is locked, tap the screen
12. or press the power or side key


13. Place the fingerprint that you registered onto the sensor to unlock your device
Facial recognition uses the contours of your face to recognise you and unlock your device. Once your face has been registered, all you need to do is look at your device and it will unlock. While this unlock method is incredibly convinient, it is recommended that you use the fingerprint lock if you wish to prioritise security.
To use facial recognition to unlock your device you will need to set up a backup lock method such as a PIN, pattern or password. This is for additional security and will be asked for in specific circumstances, such as when the device is restarted.


2. Tap Face


3. Tap Continue


4. If you are wearing glasses, tap Yes. If you aren't, tap No


5. Tap Continue
Please note: if you wear glasses most of the time you should put them on before continuing to register your face


6. Hold the device between 20-50 cm away from you, making sure that all of your face is within the box shown on the screen. Hold your device in front of you until your face has been registered. This should only take a few seconds. Once your face has been registered you can adjust some of the settings for face unlock.


7. After your device has been unlocked through face recognition it will typically stay on the lock screen until you swipe. This is to prevent accidental unlocks of your phone. Tap the switch to turn this off and go directly to the home screen


8. Tap Done to confirm your choice


9. By default, faster recognition is enabled. Faster recognition makes unlocking your device faster and can recognise you with your eyes closed but reduces security. Tap the switch if you would like to turn this feature off


10. By default, your screen will brighten when trying to recognise your face. This makes it easier to unlock your phone in the dark. Tap the switch if you wish to turn this feature off


11. Tap OK to confirm your choices
12. When your device is locked, tap the screen
13. or press the power or side key


14. A light will circle the front facing camera, indicating that it is looking for a face. Please note: if your device does not find a recognised face within the first few seconds, it will stop looking.


15. A light will circle the front facing camera to show it is looking for a recognised face
15. A light will circle the front facing camera to show it is looking for a recognised face. Once your face has been recognised a padlock icon will appear and unlock. Depending on the settings you have chosen, your device will then unlock automatically or you can swipe the screen to unlock it
Please note: iris scan is only possilbe on S8, S9, Note 8 and Note 9 devices. If you don't own one of these devices you will be unable to use the iris scan feature as it is not supported by your hardware
Iris scan captures the unique characteristics of your irises to create a lock for your device. Once your irises have been registered you will only need to look at your phone for it to recognise you and unlock. For the iris scanner to work effectively you will need to keep your device around 20-35 centimetres from your face.
To use the iris scanner to unlock your device you will need to set up a backup lock method such as a PIN, pattern or password. This is for additional security and will be asked for in specific circumstances, such as when the device is restarted.


1. Open the Settings app


2. Tap Lock screen and security


3. Tap Iris Scanner


4. Tap Continue


5. If you haven't already, you will be asked to set a secure screen lock method. This could be a pattern, PIN or password


6. Read the disclaimer, then tap OK


7. For the best results you should be indoors, away from direct sunlight and not wearing contacts or glasses. Tap CONTINUE
Follow the on-screen instruction to finish registering your irises.
If you wish to remove your iris scans, return to the Iris Scanner settings page and tap Remove iris data. This option will only be available if iris scans have already been registered.
Please note: the intelligent scan feature is only available on Galaxy S9 and Note 9 devices
Intelligent Scan uses a combination of iris scans and face recognition for added convenience and security. Intelligent scan works well even in conditions where there is low or very bright light.
To enable the intelligent scan feature you will need to set up a backup lock method such as a PIN, pattern or password. This is for additional security and will be asked for in specific circumstances, such as when the device is restarted.
Thank you for your feedback!
Please answer all questions.