Jet Bot Installation
The Samsung Jet Bot comes with everything you need. There are a few things to check when operating your Jet Bot for the first time though. The emergency switch on the side of the device should be turned on and the Jet Bot needs to be fully charged before starting. Follow the installation steps below to start using your Jet Bot.
Check your appliance first
After unboxing the Jet Bot, you'll need to check the device before its first use. Follow the device checking steps below. Moreover, please note that your Jet Bot should be fully charged before using it for the first time.


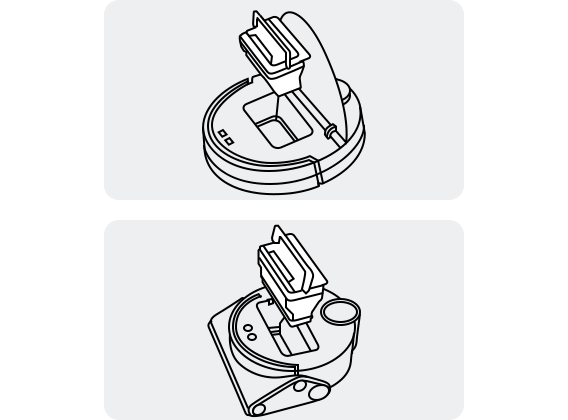
Step 1. Open the upper cover of the Jet Bot and remove the white gasket.
(Jet Bot, Jet Bot + Only)
If you have a Jet Bot AI + model, remove the sticker attached to the power switch on the side of the product.


Step 2. Check that the motor filter and fine dust filter are inserted inside the device. If there's no dustbin inside, insert the dustbin before use.
There are 2 different types of filters in the Jet Bot.
(The Jet Bot model includes the motor filter in the dust bin, while the Jet Bot AI + model includes a fine dust filter inside of the dust bin.)


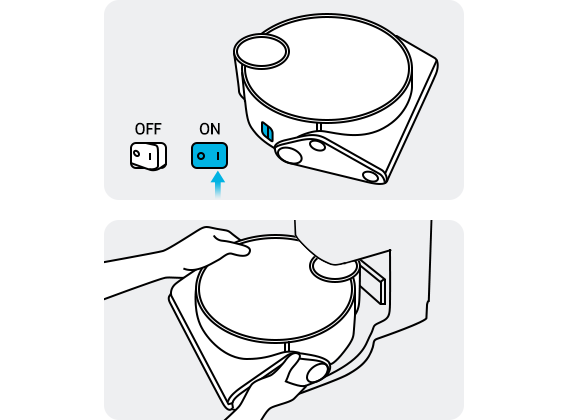
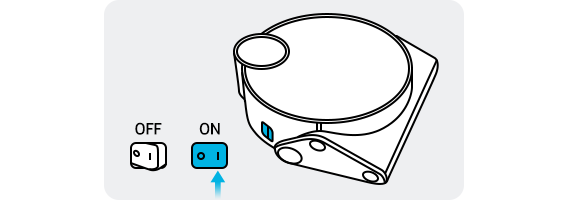
Step 3. Remove the yellow gasket attached to the power switch at the side of the Jet Bot and press the power switch to turn the Jet Bot on.
Getting started with your Jet Bot
When you’ve finished checking the device, install the Clean Station to charge the Jet Bot. The Clean Station is the charging point as well as the docking station of the Jet Bot.


Step 1. Connect the provided power cord to the docking station. Position the power cord into the fixing groove at the rear of the docking station.


Step 2. Place the Clean Station on a flat surface with no obstacles, near the power point. Do not place any objects within 0.5m on each side or within 1m in front of the Clean Station.


Step 3. Connect the cable to the power point. When the power is turned on, the status lamp at the upper part of the station briefly turns white.
Note:
- Please note that Clean Station power should be kept on.
- If the Clean Station is not powered, Jet Bot will be unable to find the docking station and will be unable to be automatically charged.


Step 1. Place the Jet Bot on the docking station manually to start charging.


Step 2. The status indicator will change to green when charging is complete.


Step 1. Check that the status indicator is green.


Step 2. Check that the emergency switch at the side is turned on or press the power switch to turn the Jet Bot on.


Step 3. Press the ▷∥ button at the top of the Jet Bot to begin cleaning.
Note:
- The emergency switch must be turned on before using the device.
- Jet Bot has no remote control. The device only has Start, Stop, and Recharge functions.
- To use a variety of convenient functions, connect the Jet Bot to SmartThings app on your smartphone.
How to use various features through the SmartThings app
If you need more information about connecting a Jet Bot to the SmartThings app and how to utilize the SmartThings features, follow the links below.
Note:
- Available technologies and functions may vary depending on the country, service provider, network environment, or product.
- Before you try out the app connection, be sure to check if your device's software and related apps are updated to the latest version.
- Mobile screen images on this content may vary depending on the device model you have.
Thank you for your feedback!
Please answer all questions.


