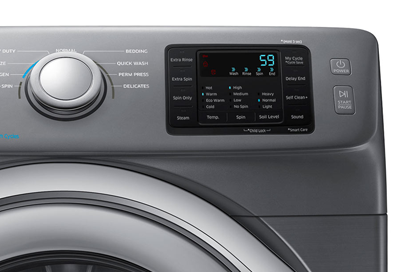
Samsung washing machine is leaking

Checkpoint
- A
- B
- C
- D
- E
- F
Inspect the hoses and connections.
Inspect every hose and its connections (on both ends) for damage. This includes the rubber on the hose, the o-rings inside the ends of the hoses, and anything the hoses connect to. Damaged hoses and o-rings should be replaced. If the washer is damaged, visit our Support Center to request service.

Check the rubber gasket (on front load models).
Inspect the door seal and carefully fold it back to look for any foreign materials or damage. Even something small can cause a leak, such as a single strand of hair or a piece of thread.
If the seal is damaged, visit our Support Center to request service.
Check the door and area around it.

Hola!
Aquí podrás navegar y comprar tal y como lo harías en la web de la tienda o marca desde la península. Tu
experiencia de compra y el surtido al que podrás acceder será exactamente la misma. Syniva solo actúa como
intermediario para poder llevarte el pedido a canarias y puedas ahorrarte el IVA.
Escoge el producto que quieras y añádelo al carrito, te mostraremos el PVP de península y el de Syniva
descontándote el IVA. Así podrás ver claramente lo que te ahorras. El total del resumen de compra incluye todos
los gastos por lo que ¡No te llevarás ninguna “sorpresa” al recibir tu pedido!
Ten encuenta que navegas en la web que la marca o tienda online ofrece a los residentes de la península y es
posible que veas información o condiciones específicas para ese territorio. Recuerda que tienes toda la información
de Syniva en el apartado de ayuda: métodos y costes de envío, métodos de pago y cualquier información relativa a
los servicios de Syniva . Para cualquier consulta puedes ir al apartado de Faqs del menú ayuda o escribirnos a
hola@syniva.es
¡Disfruta de tus compras!
Check that it's inserted between 6-8 inches.
The drain hose must be inserted into the drain pipe at least 6 inches, and no more than 8 inches. Use the hose guide included with the washer to help, and then once the drain hose is in place, secure it with a zip tie so it will not slip down farther.
If the drain hose is more than 8 inches deep, it creates a siphoning effect which will cause issues with the washer. If the drain hose is inserted less than 6 inches, it may fall out which will cause water to spill all over the floor.

Make sure the drain hose does not form an airtight connection.
Measure and confirm the height of the drain hose.
Most homes will already have the correct measurements, but it is good to check anyway to be sure. The drain hose should be positioned at least 18 inches high and no more than 96 inches high. You should not use a drain hose extension kit.
These requirements are different if a sink is being used. The drain hose should be positioned at least 24 inches high for sinks and no higher than 35 inches.
Inspect the drain hose for damage, kinks, or bends.
The hose should run smoothly from the washer to the home's drainage system. Bent or pinched hoses can cause leaks or draining issues.
If the drain hose is damaged, request service.
Confirm the drain hose holder is installed.
It may be tempting to unscrew this clamp holding the drain hose to the back of the washer, especially if the drain hose doesn't quite reach as far as you want it to. However, removing this may cause the washer to drain automatically and give an LC or 4C error code.

Locate and open the pump filter.
Most front load models have an accessible pump filter (also called a debris filter) on the front of the unit, near the bottom. This pump filter requires routine maintenance to be kept clean. The recommended interval is at least once a month, or every 40 washes, whichever is more frequent.
If cleaned often, it will never get clogged, and your washer will stay in good condition. If neglected, it can clog and cause issues with draining and even leaks.
To begin, open the pump filter door panel by pressing on the cover.

Prepare to drain the water.
Remove the cap and drain the water.
Remove the cap from the drain hose by holding the hose and twisting the cap. The cap can be tough to remove because it forms an airtight seal, so make sure to use a little elbow grease. Once the cap is removed, drain the water.

Fully remove the pump filter.
Once all the water is drained, remove the washer pump filter by twisting it counter-clockwise.
On some Samsung washers, the washer pump filter (A) is similar to the cap on a medicine bottle. Push in and twist it to remove the cap.

Clean the pump filter.
Using a small toothbrush or other similar soft bristle brush, wash any dirt or other materials from the pump filter. Inspect the drain pump impeller (located inside the pump filter housing) to make sure it is clean.

Reinsert the pump filter.
Reattach the drain hose.
Check for and remove soap scum buildup.
Using too much detergent or non-HE detergent (even once) can result in excessive suds, causing detergent residue that contributes to multiple performance issues, including leaks or leak errors. If there's a chance that any cycle was run with excess or non-HE detergent, you should check for and remove the detergent residue.
Run an empty cycle and do not add detergent or any other additives. If suds appear in the wash, it is coming from the detergent residue, and you should continue to run empty cycles until suds no longer appear.
Use the correct amount of HE detergent.
Use trial and error to find the least amount of detergent that achieves the best cleaning results, and do not exceed either of these two recommendations:
- The MAX line in the detergent drawer.
- The maximum recommended by your detergent's manufacturer for the load size you're washing.
If either of these are exceeded, it will result in soap scum buildup in your washer. Using the minimum amount of detergent you need to get your clothes clean also helps prevent this buildup.
- If you're using liquid detergent, make sure the Liquid Detergent Tray (A) is in the drawer.

- If you're using powdered detergent (B), make sure the Liquid Detergent Tray is removed.

Confirm the detergent drawer is completely assembled.
Ensure the washer isn't overloaded or too full.
Check the floor and surrounding space.
Before you begin the process of leveling, make sure to have one inch of separation between the washer and dryer and from any wall.
You'll also want to make sure the floor is stable and free from damage. A slippery floor can disturb the balance of the washing machine.
Gently slide the washer into position.
Try to rock and wobble the washer.
The washer should have a solid and firm connection at all four corners. If one corner wobbles, first shorten the legs of all the other corners. If they're already as short as they can be, then the wobbly corner's leg should be lengthened.

Release the locking nuts (front load models only).
Use a flat blade screwdriver to loosen the locking nut of the legs you'll be adjusting.

Adjust the legs and repeat the previous steps as needed.
Turn the adjustable legs clockwise to raise that corner of the washer, and counterclockwise to lower that corner of the washer.
Continue to make adjustments and repeat the previous steps until the washer is level. As you're making adjustments, keep in mind that the shorter you can keep the legs, the more stable the washer will be. Make sure that all feet are making contact with the floor.
Front load models:

Front load models:

Tighten the locking nuts (front load models only).
Just like before, use a flat blade screwdriver to tighten the locking nuts up against the washer.

Run a test cycle.
Follow the troubleshooting steps in the video.
Determine if you need to run a test cycle.
If none of the troubleshooting steps in the video resolved your leak issue, visit our Support Center to request service.
However, if you encountered any of the problems in the list below, then it's worth the time to run a test cycle (like Rinse & Spin) to see if the leak continues.
- Found and corrected an issue with the hoses, connections, or door gasket
- Had soap scum that needed to be cleaned out
- Discovered your drain hose was not installed correctly and fixed it
- Had a very dirty pump filter that is now clean (front load models only)
- Needed to level the washer because it wasn't level
Request service.


Thank you for your feedback! Your comment has been submitted.


