Use the racks in your Samsung wall oven
When using your Samsung wall oven to cook dinners or bake desserts, you should think about where to place the oven racks. This includes the gliding rack, which can be used to quickly pull food out when it’s finished cooking. Different positions for each rack will affect your food’s quality, so each food type has a recommended rack position. If your model has a Flex Duo rack divider (which splits the oven so you can use two different temperatures at once), it should only be inserted into one specific slot. When it’s inserted, there’s a different set of recommendations for every rack position.
Install and use the oven racks
Caution: Make sure the oven is off and cool before installing or removing the racks. Always use oven mitts when handling the racks while the oven is on.
It's Cooking 101. You'll need to learn how to properly remove and insert the oven racks so you can put them in the appropriate position for whatever you are cooking or baking. Having them installed correctly will also prevent them from falling or causing other issues.
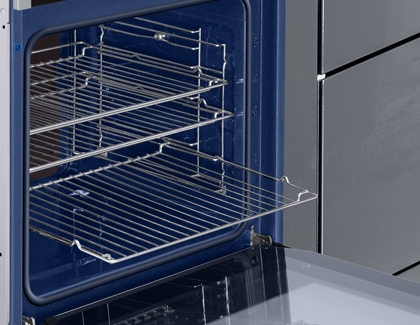
To remove a rack, pull the rack straight out until it stops.
Finish by lifting up the front of the rack, and then pull it out completely.
To reinsert the rack in a new position, place the back end of the rack on the support.
Tilt the front end up, and then push the rack into place.
Install and use the gliding rack
Caution: Before installing the gliding rack, make sure the oven is off and cool. The gliding rack should be in the closed position.
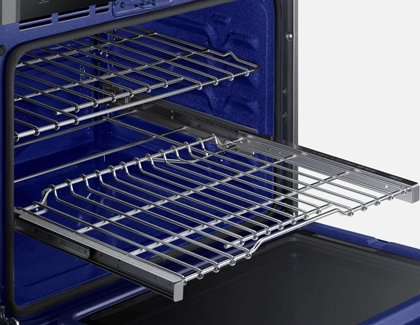
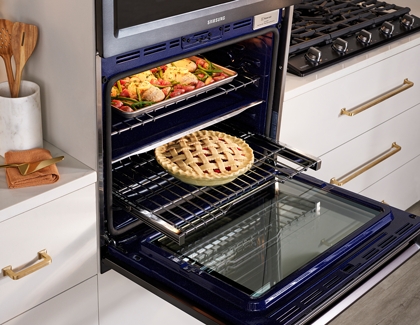
The gliding rack is a special rack that you can extend forward far out of the oven without having to completely remove it. This makes it easier to place or remove food from the rack, especially if it's a dish that is heavy.
To install the gliding rack, carefully insert the gliding rack between the guides until it reaches the back.
Note: Do not install the gliding rack directly above the flat rack. The rack could fall.
To use the gliding rack while cooking, carefully pull it out while holding the rack's handle. Make sure you use oven mitts when handling the gliding rack while the oven is on. Now you can easily place or remove food on the rack without having to stick your hand far into the oven.
Note: If you grasp the frame to slide the rack out, the entire gliding rack will be removed.
To glide the rack back in, grasp the handle of the rack, and then push it into place.
To completely remove the rack from the oven, grasp the rack and frame together, and then pull both forward.
Install the Flex Duo divider
Caution: Always use oven mitts when handling the divider while the oven is on. Use both hands when inserting or removing the divider.
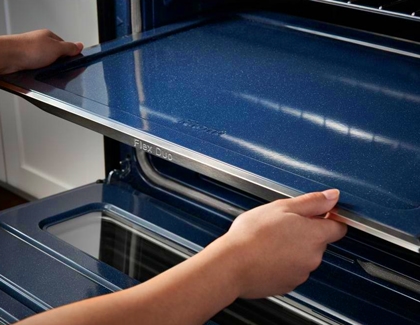
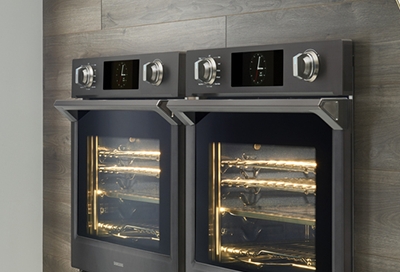
Have you ever wanted to cook two things at once to save time, but the recipes required two different temperatures? With the Flex Duo divider (available on select models), you can split the oven in half and use two separate temperatures simultaneously!
To begin using Flex mode, insert the divider into the fourth rack position.
Then, push the divider in until its back rests against the back of the oven cavity.
Note: When the oven displays -dC-, check if the divider is installed correctly.
Once the divider is in place, you can use the Flex Duo feature to cook with two separate temperatures at once.
Oven rack positions for cooking and baking (Single mode)
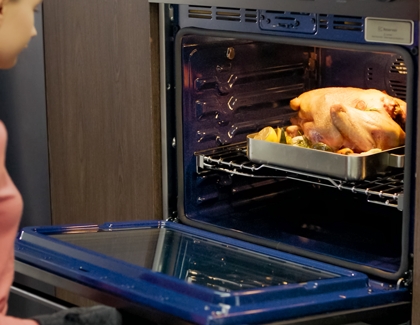
When your wall oven is in Single mode, it means the Flex Duo divider is not inserted. Before deciding where your racks should go, you should take the location of each rack and the food you are cooking into consideration. For example, center or lower racks are best for browning pizza crusts or evenly cooking a casserole. For large roasts, such as a whole turkey, you should use the lowest rack position so your food receives the best amount of heat circulation. The topmost positions should be used for food that you’d like to broil or toast, such as bread.
When broiling hamburgers, small cuts of poultry, or fish, you should use Row 6. You can also use Row 4 or 5 if you do not want your poultry or fish to be too crispy. Since Row 6 is the closest to the broiling element in your oven, the food placed there will cook faster.
Rows 3 and 4 are best suited for casseroles, as well as baking Bundt cakes, pound cakes, or frozen pies. These middle racks provide even circulation and will cook your food thoroughly from all sides. However, delicate cake mixtures such as Angel food should be placed lower, on Row 2.
Small roasts can be placed on Row 2, while larger and heavier roasts, such as hams, should go on Row 1. Row 1 is also ideal for cooking fresh pizzas and for roasting vegetables.
To get the best results when baking, you should center the baking pans on the racks. When you’re baking cakes and cookies on multiple racks, try placing the oven racks in positions 3 and 5. This will ensure the racks receive enough heat without burning your food.
Oven rack positions for cooking and baking (Flex mode)
When you're in Flex mode, it means that you have the Flex Duo divider inserted and that your oven has been separated into two sections. While in Flex mode, the upper oven has two rack positions, while the lower oven has four rack positions. Keep this in mind when reading our tips, so you don't get confused.
Frozen pies should be placed on Rows 2 or 5. In this center position, pies can defrost easily while receiving an even amount of browning on the bottom and top.
Other desserts and baked goods that can be placed on Rows 2 and 5 include muffins, brownies, cookies, cupcakes, layer cakes, and biscuits.
To cook a small roasted turkey or ham, use Rows 2 or 5. Keep in mind that a large sized roast may not fit in the oven when using Flex mode.
To bake cakes such as Angel food cakes, Bundt cakes, or pound cakes, you should use Row 2.
Row 1 is ideal for medium-sized roasts.
To get the best results when baking, you should center the baking pans on the racks. When you’re baking cakes and cookies on multiple racks, try placing the oven racks in positions 3 and 5. This will ensure the racks receive enough heat without burning your food.
Other answers that might help
-
Mobile 8 AM - 12 AM EST 7 days a week
-
Home Electronics & Appliance 8 AM - 12 AM EST 7 days a week
-
IT/Computing 8 AM - 9 PM EST 7 days a week
-
Text Support 24 hours a day 7 Days a Week