SmartThings Wifi advanced network settings

SmartThings Wifi offers a suite of advanced settings that enhance your network's functionality. These settings allow you to modify your network mode, integrate a custom DNS for improved parental and security control, and configure port forwarding to optimize gaming experiences.
Creating a Dedicated Network for Smart Devices
To allocate a separate network for your smart devices, you can switch your network mode to Router Only. Here’s how:
Ensure the Plume Wi-Fi app is installed and operational on your phone.
Open the SmartThings app, access the Menu (represented by three horizontal lines), and select All devices. Choose your SmartThings Wifi hub from the device list. In the Plume section, select Advanced settings to launch the Plume app. Tap the Menu icon, then SmartThings Wifi Hubs, followed by the Advanced settings icon (three gears symbol).
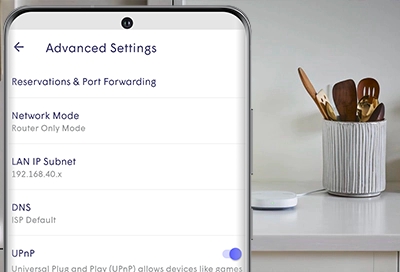
Within the advanced settings, you can modify:
Reservations & Port Forwarding: IP Reservations maintain a consistent IP address for specified devices. For applications, like games, port forwarding allows designated ports through the firewall for internet communication. Begin by creating a New IP Reservation for your device—either manually or by selecting a connected device—followed by adding port assignments.
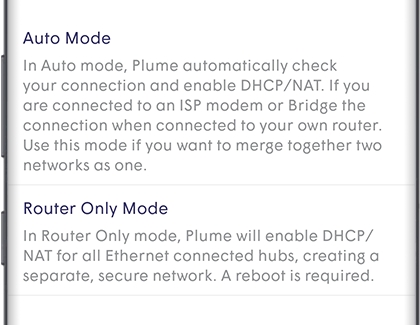
Network Mode: The Auto Mode feature enables DHCP/NAT automatically to merge networks. In Router Only Mode, DHCP/NAT is activated for Ethernet-connected hubs, creating an independent, secure network. This mode requires a network reboot.
LAN IP Subnet: This setting defines a group of devices on the same local network. To adjust your LAN IP subnet address, enter your preferred number and save the changes.
Note: Some settings are exclusive to Router Only Mode.
Utilizing a Custom DNS for Enhanced Control
Beyond the parental controls available to Plume members, configuring a custom DNS offers additional site access restrictions. This configuration enables the use of a public DNS outside your ISP's monitoring or one with built-in parental and security features, like OpenDNS.
To configure a custom DNS:
Ensure the Plume Wi-Fi app is ready on your phone. In the SmartThings app, navigate to Menu > All devices, and select your SmartThings Wifi hub. Access Advanced settings in Plume to open the app.

Set the Network Mode to Router Only and restart the network for the changes to take effect.
Under DNS settings, activate Custom DNS and enter your preferred DNS addresses.
Manual Setup for SmartThings Wifi
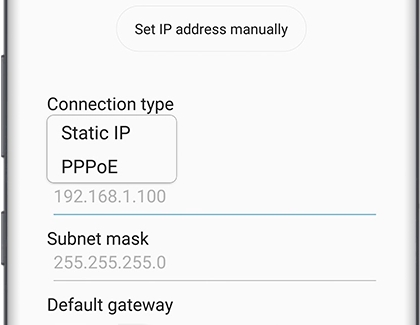
If you encounter connection issues with SmartThings Wifi, checking your network setup is crucial. The setup might involve PPPoE (Point-to-Point Protocol over Ethernet) for Ethernet connections or a static IP address commonly used in homes, hotels, and workplaces. Familiarize yourself with the manual setup process for your network type.

-
Mobile 8 AM - 12 AM EST 7 days a week
-
Home Electronics & Appliance 8 AM - 12 AM EST 7 days a week
-
IT/Computing 8 AM - 9 PM EST 7 days a week
-
Text Support 24 hours a day 7 Days a Week
Contact Samsung Support


