Set up your Galaxy A15 5G, A25 5G, or A35 5G for the first time

Our guide covers everything you need to know about the initial setup process for the Galaxy A15 5G, Galaxy A25 5G, and Galaxy A35 5G, such as inserting your SIM card, turning on your phone, transferring data from a previous device, setting up your voicemail, making phone calls, and taking photos with the Camera app.

Set up your Galaxy A15 5G, A25 5G, or A35 5G for the first time

SIM cards and mobile service

Note
The Galaxy A15 5G and Galaxy A25 5G do not support eSIM functionality. The Galaxy A35 5G supports Hybrid eSIM functionality.

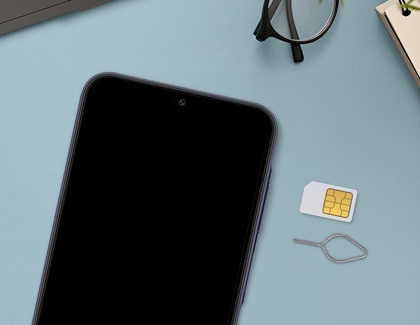
SIM cards provide access to your wireless service provider’s mobile data network. If your mobile service is active, the network will automatically connect when your SIM card is inserted, and calls, texts, and network usage will be available. Please contact your carrier with questions concerning activation, 5G connectivity, service, or billing.


  1. Insert the ejector tool that came with your phone into the hole on the SIM card tray.
    Important: Be careful not to insert the ejector tool into any of the microphone or speaker holes along the edge of your phone. Look for the outline of the tray to make sure you're in the right place.
  2. Next, push the tool until the tray pops out.
  3. Carefully line up your SIM card with the smaller cutout on the tray.
  4. Verify the card is flush with the tray, and then insert the SIM tray back into the slot on your phone.
  5. Lastly, you can charge and turn on your phone, and then complete the initial set up. Please see the next two sections in this article for more information.
  6. Your personal voicemail can be configured in the Phone app after completing the phone’s initial set up. Please see the third section in this article for more details.
Read less

Charge and turn on your phone

Once your SIM card is ready to go, you can charge and turn on your Galaxy A15 5G, A25 5G, or A35 5G for the first time.


Charge your phone

The Galaxy A15 5G, A25 5G, and A35 support Super Fast Charging but do not support Wireless Charging. Both models are compatible with 15W and 25W charging adapters, although the charging adapter is not included in the box.

  1. First, connect a USB cable to the charging adapter, and then insert the other end of the USB cable into the USB port on your phone.
  2. You can then connect the adapter to a power source.
    Note: For the fastest charging time, connect your adapter to a power outlet. Plugging the USB cable into a computer or another device will lengthen the charging time.
  3. When your phone is finished charging, disconnect the USB cable from your phone, and then remove the adapter from the power source.


Turn your phone on and off

  1. To turn on your phone for the first time, press and hold the Side button on the right side of the phone until the phone vibrates.
  2. The Samsung logo will appear, and then you will be able to set up your device. Please see the next section in this article for more information about the setup process.

There are two different ways to turn off your phone:

  • Press and hold the Side and Volume down buttons, then tap Power off, and then tap Power off again.
  • Swipe down from the top of the screen using two fingers to open the Quick settings panel, and then tap the Power icon. Tap Power off, and then tap Power off again.
Read less

Initial setup

Although the initial setup process for your Galaxy A15 5G, A25 5G, or A35 5G may differ depending on your carrier, you can use the following steps as guidelines when setting up your phone.


  1. Make sure your phone is turned on, and then select your desired language. Tap Start to continue.
  2. Review and agree to the Terms and Conditions, Privacy Policy, and diagnostic data information, and then tap Agree.
  3. At this point, the next few steps may differ; for instance, you may be prompted to transfer settings and accounts from another device if desired.
  4. Next, choose a Wi-Fi network. Your phone will scan for nearby networks; select your desired network when it appears, and then enter the password if needed.
  5. You will be prompted to sign into your Google account. Enter your account credentials, and then agree to the Google Terms of Service and Privacy Policy. You may also see information about Google Assistant.
  6. Next, sign into your Samsung account. Enter your account credentials, and then agree to the Samsung Service Terms and Conditions and Special terms. You may also see information about Samsung Customization Service.
  7. Finally, select your desired display mode, and tap Finish or Done. You can now start enjoying your phone!
Read less

Transfer content

You can restore data from another device if it has been backed up to a cloud account, such as Samsung Cloud, OneDrive, or Google Drive. You can also use Smart Switch during the phone’s initial setup process.


If you are unable to retrieve data from an account or choose not to, then you can perform the following steps to back up and restore your data. Keep in mind that creating and restoring backups may take some time if you have a large number of files and data.


Create a backup

  1. Navigate to and open Settings, then tap Accounts and back up, and then tap Manage accounts. If you did not add your Google or Samsung accounts to your phone during the initial setup process, you can do so now by tapping Add account, and then selecting Samsung account or Google. Follow the prompts to sign into your account(s).
  2. Next, navigate back to the Accounts and backup settings screen, and tap Back up data under Samsung Cloud or Google Drive.
  3. If you choose Samsung Cloud, you can select the data to be backed up, and then tap Back up now.
  4. If you choose Google Drive, you can enable Backup by Google One by tapping its switch, and then tap Back up now.


Restore your data

Navigate to and open Settings, then tap Accounts and back up, and then tap Manage accounts. From here, you can select from the following options:

  • Restore from Samsung Cloud: Tap Restore data under Samsung Cloud, then select your desired device backup, and then select the content you want to restore. Tap Restore, and then tap Install if prompted.
  • Restore from Google Drive: Sign into your Google account using the steps in the above section. Once you are signed in on the new phone, data that has been previously backed up on the account will be added to the new phone.
  • Restore using Samsung Smart Switch: Tap Bring data from old device under Smart Switch, and then tap Receive data. Select Galaxy/Android or iPhone/iPad, then choose either Cable or Wireless, and then follow the instructions to transfer your data. You can check out our Smart Switch guide for additional details and instructions.


Read less

Use the Phone app and Messages app

Note
Please contact your carrier with questions or issues concerning voicemail setup and usage, and sending and receiving calls or messages. 
Hand holding a Galaxy A35 displaying the phone app
  1. Navigate to and open the Phone app, and then touch and hold 1. Next, follow the prompts to create a password, record a greeting, and record your name.
  2. To review your voicemail details, tap More options (the three vertical dots), then tap Settings, and then tap Voicemail.
  3. To start a new call, begin dialing the desired phone number using the keypad, and then tap the green Phone icon at the bottom of the screen.Green phone icon highlighted in the phone app on a Galaxy A35
  4. To end the call, tap the red Phone icon at the bottom of the dialer screen.
  5. You can view the phone numbers stored in your phone with the Contacts app. Tap the Contacts tab in the Phone app to bring up your Contacts screen. Find and tap your desired contact in the list, and then tap the green Phone icon to call the contact.
    Note: You can also find the Contacts app by swiping up on a Home screen to access the Apps screen.
  6. When receiving a call, just tap the green Phone icon to answer. To reject the call, tap the red Phone icon.


For additional information, as well as tips and tricks for using the Phone app, you can check out the following guides:

●     Manage your phone’s contacts

●     Block phone numbers and contacts

●     Use call forwarding, call waiting, and conference calls


Send and receive messages in the Messages app


  1. To send a new message or to answer an incoming message, navigate to and open the Samsung Messages app.
  2. New messages will appear in the Conversations tab. Tap your desired message, and then use the keyboard to write your reply and send it.
  3. To start a new message, tap the Compose new message icon (the speech bubble) in the bottom right corner, and then tap Recipient. You can begin typing a phone number, or tap Add from contacts (the plus sign) to select a contact.
  4. Then, use the keyboard to write and send your message. You can attach images, videos, audio files, calendar info, notes from Samsung Notes, your location, or Contact details.


For more information about using the Messages app and its features, you can check out the following guides:

●     Use the Samsung Messages app

●     Use group text messages

●     Block phone numbers and contacts

Read less

Use the Camera app and the Gallery app

You can take photos and videos on your Galaxy A15 5G, A25 5G, and A35 5G using the Camera app. The content you capture will then be saved in the Gallery app, where you can view your photos and videos.


Capture photos and videos in the Camera app

  1. Navigate to and open the Camera app, and then swipe left or right on the shooting modes at the bottom of the screen. You can tap MORE to view additional modes, such as PRO, NIGHT, and MACRO.
  2. Next, depending on the selected mode, you can use the toolbar at the top of the screen to adjust the flash, timer, ratio, resolution, and effects.
  3. Tap the Capture icon at the bottom of the screen to take a picture. To record a video, touch and hold the Capture icon, and then swipe up to lock the video. Continue recording, and then tap the Stop icon to save the video.
    Note: You can also tap VIDEO to use the video shooting mode.
  4. Photos and videos will be saved to the Gallery app. Tap the thumbnail of the picture or video in the bottom left corner of the Camera app to view your content in the Gallery app.
     

View photos and videos in the Gallery app

  1. Navigate to and open the Gallery app, and then select from the tabs at the bottom to view your photos and videos. You can tap Pictures, Albums, or Stories.
  2. To move items or use more options, touch and hold the desired photo or video, and then select from the following:
  • Create: Choose from GIF or Collage.
  • Share: Use a sharing option to share the item.
  • Delete: Remove the item from the Gallery app.
  • More: Select from various options such as Copy to album, Move to album, Add to shared album, Add tag, or Set as wallpaper.


To learn more about using the Camera and Gallery apps, please refer to our guides:

Read less

Access the user manual


If you’re uncertain about one of your phone’s functions or options, or simply want to learn more about using it, you can check out the User manual. Just navigate to and open Settings, then swipe to the bottom of the Settings screen, and then tap User manual. The manual will open in a browser window.

Read less
Was this content helpful?
We're here for you

Contact Samsung Support

Contact us online through chat and get support from an expert on your computer, mobile device or tablet. Support is also available on your mobile device through the Samsung Members App.
auto-contact_us-pc-2x auto-contact_us-pc-2x