Manage your contacts with ease on your Galaxy phone and tablet

Manage your contacts with ease on your Galaxy phone and tablet
Set up your profile
To access your contact information, you probably shuffle between different apps, like your email. Instead, keep all of your contact info in one place by setting up a profile in the Contacts app.
- Navigate to and open Contacts. Tap your name at the top of the screen.
Note: You can also access your profile by opening Settings and then tapping your Samsung account name at the top of the screen. - If needed, sign in to your Samsung account.
- When you’re logged in, you will see all of your information listed, such as your phone number, email, your Emergency contacts, and more.
- Tap Edit at the bottom of the page to edit your desired information.
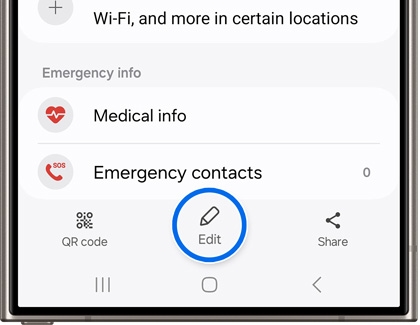
- When you're finished, tap Save on the bottom right-hand corner. Now your profile and contact information will be easy to find in case there is an emergency, like if you lose your device.
For additional options, you can use Samsung Cloud to sync data across your other devices, as well as Google to back up and sync your contacts.
Share your profile
You can also share your profile information with others. That way, you can send your contacts one big message, instead of typing it out every time.
- To go to your profile page, open Contacts, and then tap your name at the top of the screen.
- Tap Share, and then select either Share as file or Share as text.
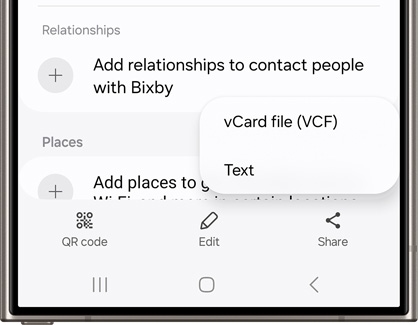
Note: On some devices, these options may be worded differently. - Then, choose your sharing method, and send your profile. Now everyone will get one tidy message with the info they need to reach you.
Add a new contact
If you meet someone new and get their contact information, it's easy to add them to your phone or tablet.
- Open the Contacts app, and then tap Add (the plus sign).
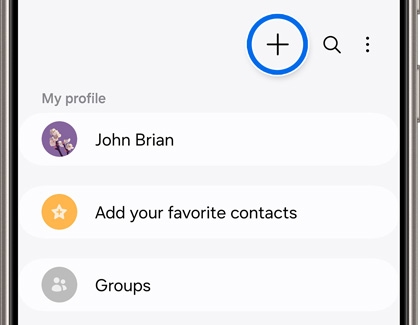
- Tap the drop-down menu in the upper left corner to choose where you want to save the contact, such as Phone or Google.
- Next, fill out their contact information and personal details. You can add multiple numbers and addresses in the Phone and Email fields by tapping Add phone number or Add email.
- When you're done, tap Save to add them as a Contact.
Edit a contact
Did your friend just get a new job and a new work number? Just follow these steps to edit their contact information.
- Open the Contacts app, and then tap the contact you want to adjust. Tap Edit.
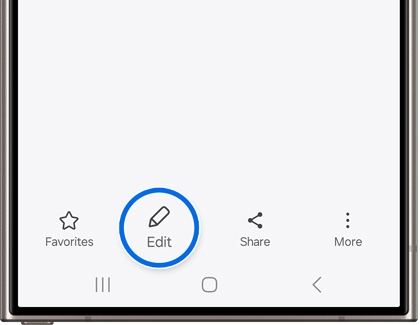
Note: You can change your contact’s information by tapping the desired field. - To add additional numbers or email addresses, tap on your desired field and then tap Add.
- To delete something, tap Remove (the minus icon) next to it.
- Tap View more to edit additional options like address, notes, relationship, etc.
- When you’re done editing, tap Save.
Set a ringtone for a specific contact
Even if you don’t play favorites, the truth is some contacts are more important than others. For example, family members are going to take priority over acquaintances. To help you differentiate who is calling, you can set ringtones for specific contacts.
- On your device, navigate to and open the Contacts app.
- Select your desired contact, and then tap More.
- Tap Change ringtone/vibration, and then tap Ringtone. If needed, allow the different permissions.
- At the top of the screen, you'll be able to enable or disable Ring even when set to Vibrate or Mute by tapping the switch.
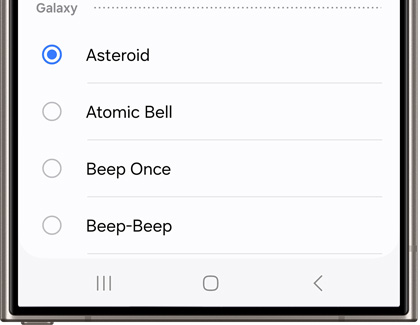
- Choose any ringtone, and then tap Back. Tap Save to set that ringtone to the contact.
Share contacts
You can import and export your contacts right from the Contacts app! Your contacts will also sync between your devices if they are signed into the same Samsung account.
- Open the Contacts app, and then tap a contact you want to share. Tap Share at the bottom.
- Select how you’d like to share the contact. You can choose from Share as file or Share as text.
Note: On some devices, these options may be worded differently.
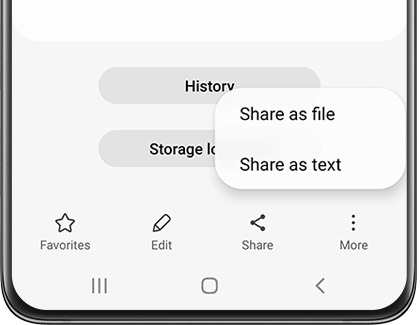
- Next, choose your preferred sharing method, such as Quick Share or email, and then follow the necessary prompts. Depending on your sharing method, you may need to select Import on the other device.
- To share multiple contacts, navigate to the Contacts screen, and then touch and hold your desired contact. Then, tap additional contacts you'd like to share. Or, you can tap All in the top left corner. Once you've made your selections, tap Share, and then select a sharing method.
- Follow the prompts on the other device to import the contacts.
- You can also share a contact with another device using a QR code. Tap a contact, then tap More (the three vertical dots) at the bottom, and then tap QR code.
- Then, using the other device, open the Contacts app. Tap More options (the three vertical dots), and then tap Scan QR code. Position the device to scan the code.
Note: You can also use a QR app to scan the code.
If you’re having trouble syncing your contacts, you can review our syncing guide for assistance. You can also use Smart Switch to transfer all of your contacts from another device.
Manage duplicate contacts
If your friend keeps getting a new number, things can get confusing. Instead of having their name repeat multiple times in your Contacts, just link them together.
- Navigate to Contacts, and then tap Menu (the three horizontal lines).
- Tap Manage contacts, and then tap Merge contacts.
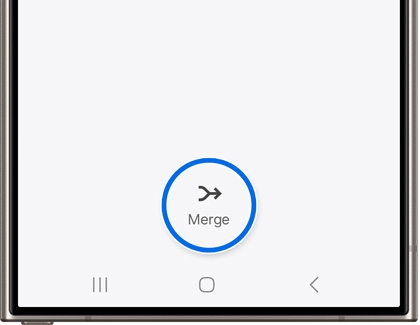
- You can choose to merge duplicate numbers, emails, or names. Select the repeats, and then tap Merge.
Set your favorite contacts
If you’re always calling or texting someone, like your best friend, you can set them as a favorite contact.
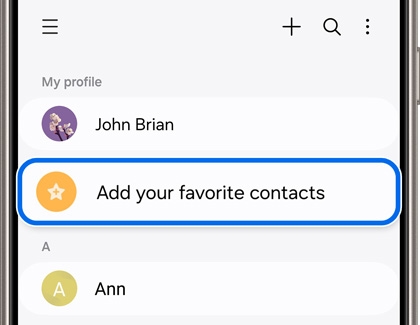
- Navigate to Contacts, and then tap Add your favorite contacts at the top.
- You can search for a contact’s name or swipe through the list to find someone. Select your desired contact(s), and then tap Done.
- Your selected contact(s) will then appear at the top, under Favorites. However, they will still appear in your general contacts list below.
Note: To add additional favorite contacts, select a contact, and then tap Favorites (the star icon) at the bottom. The icon will turn yellow. - You can also reorder your favorite contacts. From the Contacts screen, tap More options (the three vertical dots), then tap Reorder Favorites, and then use the arrows to drag and drop your contacts into your desired position. You must have at least two favorite contacts to reorder them.
- If you need to remove a contact from your favorites, just select the desired contact, and then tap Favorites. The icon will turn white.
Create a group
You have a lot of work to do, and you need everything to be strictly business – including your contacts. No worries, you can keep work and your personal life separate by making a Group in Contacts, where you will only see certain contacts.
- Navigate to Contacts, then tap Menu (the three horizontal lines), and then tap Groups.
- Tap Create group, and then name the group. You can also customize a group ringtone.
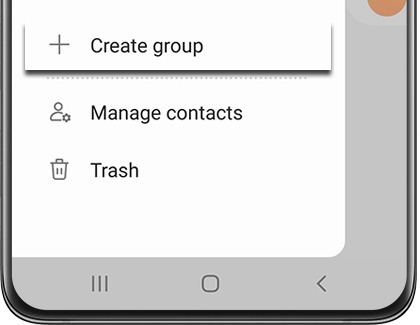
- Tap Add member, choose your desired contacts to add to the group, and then tap Done. Tap Save.
- You can assign new or existing contacts to the newly created group anytime.
Add contacts to speed dial
Speed dialing is convenient when you need to call someone as quickly as possible. You can assign a contact to a Keypad number of your choice in the Phone app.
- Navigate to and open the Phone app, and then make sure Keypad is selected at the bottom.
- Tap More options (the three vertical dots), then tap Speed dial numbers, and then tap the drop-down menu to select your desired keypad number.
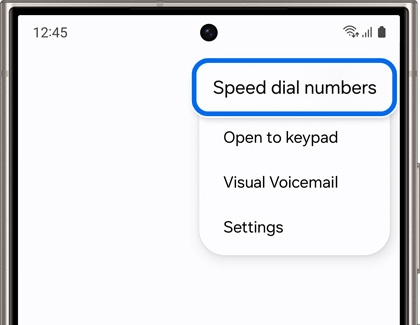
- Next, enter the contact's name or number, or tap the Contacts icon (it looks like a person) to directly add a contact.
- Now when you select that number in the Keypad, your assigned contact will appear.
Add a contact to the Home screen
You can add a contact to a Home screen with the Contact widget.
- Navigate to a Home screen, and then touch and hold an empty space.
- Tap Widgets, and then tap the Contacts widget.
- Select from Contact, Direct Dial, or Direct Message as your widget, and then tap Add.
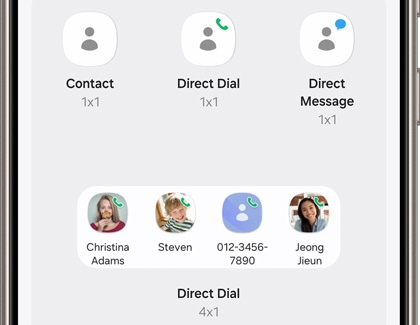
Note: If you select the Direct Dial widget, your contact will be called when you tap the widget on the Home screen. - Next, select your desired contact. Now, the contact will appear on your Home screen.
Block a contact
The Contacts and Phone apps allow you to block and unblock contacts if the need ever arises. You can also block numbers using the Smart Call feature on select models, which will recognize numbers that are not in your contact list. If you’re receiving voicemail messages from unknown callers, you can prevent this as well.

Manage contact storage
If you need to store your contact information elsewhere, you can move it to a SIM card. Just make sure a SIM card has been inserted into your device before you begin.
- Navigate to and open the Contacts app.
- Tap Menu (the three horizontal lines), tap Manage contacts, and then tap Move contacts.
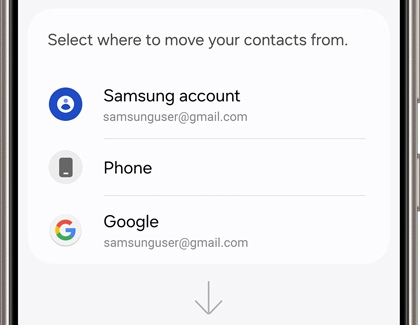
- Select your preferred option, select your desired contact(s), and then tap Done.
- Select the new location to send the contact(s) to and then tap Move.


Contact Samsung Support

-
Mobile 8 AM - 12 AM EST 7 days a week
-
Home Electronics & Appliance 8 AM - 12 AM EST 7 days a week
-
IT/Computing 8 AM - 12 AM EST 7 days a week
-
Text Support 24 hours a day 7 days a week

You Are About To Be Redirected To Investor Relations Information for U.S.
Thank you for visiting Samsung U.S. Investor Relations. You will be redirected via a new browser window to the Samsung Global website for U.S. investor relations information.Redirect Notification
As of Nov. 1, 2017, the Samsung Electronics Co., Ltd. printer business and its related affiliates were transferred to HP Inc.For more information, please visit HP's website: http://www.hp.com/go/samsung
- * For Samsung Supplies information go to: www.hp.com/go/samsungsupplies
- * For S.T.A.R. Program cartridge return & recycling go to: www.hp.com/go/suppliesrecycling
- * For Samsung printer support or service go to: www.hp.com/support/samsung
Select CONTINUE to visit HP's website.


