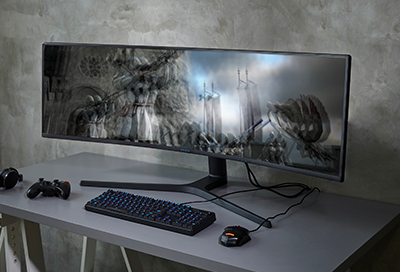
Problems with the picture on Samsung TV or projector

If you’re experiencing picture issues with your Samsung TV, Odyssey Ark gaming screen, or projector, including freezing, a flickering or cloudy screen, or distorted colors, you can solve them using a few different methods. Running a Picture Test, performing an HDMI test, and updating the firmware can help you determine how to fix the problems.
Picture Test screen displayed on a Samsung TV

Problems with the picture on Samsung TV or projector

TV freezes during normal use

  1. Update the firmware using your TV’s network connection.

    Important: Software updates generally take a few minutes, so do not turn off the TV until the update is complete. Video and audio settings may be reset to their default settings after a software update.

    If your TV is connected to the internet, you can update the firmware using your TV's Settings menu.
    • On 2022 and later TV models: Navigate to and select All Settings, and then select Support. Select Software Update, and then select Update Now.
    • On previous TV models: Navigate to Settings. Select Support, select Software Update, and then select Update Now.

      Your TV will check for an update. If one is available, it will start downloading the update. After the update is installed, the TV will shut down and restart.

      Once the TV restarts, press and hold the Power button on your remote until the TV turns off and back on.

      If the picture continues to freeze after the firmware update, please contact Samsung Support for further assistance.
      Update Now selected on a Samsung TV
  2. Download the firmware from Samsung.

    If your TV is not connected to the internet, you can download the update from the Samsung website.

    On a PC, navigate to the Samsung Download page and find your TV model. Next, download the latest firmware file. Using a USB drive, extract the firmware file. Make sure there are no other files or folders on the USB drive.
    • On 2022 and later TV models: Connect the USB drive to a USB port on your TV. Navigate to All Settings, and then select Support. Select Software Update, and then select Update Now.
    • On previous TV models: Connect the USB drive to a USB port on your TV. Navigate to Settings, select Support, and then select Software Update. Select Update Now, and then select Yes.

      The TV will install the update and then restart. Once the TV restarts, press and hold the Power button on your remote until the TV turns off and back on.

      If the picture continues to freeze after the firmware update, please contact Samsung Support for further assistance.
Read less

7 series Crystal UHD TV freezes when changing the HDMI source

If you are trying to switch HDMI sources on your 7 series Crystal UHD TV and it freezes, refuses to change, or changes slowly, updating the firmware to version 1371.0 or higher will fix the problem.

Update the firmware using your TV’s network connection


If your TV is connected to the internet, follow these steps:

  1. Navigate to All Settings, and then select Support.
  2. Select Software Update, and then select Update Now.
  3. Your TV will check for the update and should start downloading the update.
  4. After the update is installed, the TV will shut down and restart.
  5. Once the TV restarts, press and hold the Power button on your remote until the TV turns off and back on.

    If the picture continues to freeze after the firmware update, please contact us.

Download the firmware from Samsung


If your TV is not connected to the internet, follow these steps to update the firmware:

  1. On a PC, navigate to the Samsung Download page and find your TV model.
  2. Next, download the latest firmware file.
  3. Using a USB drive, extract the firmware file. Make sure there are no other files or folders on the USB drive.
  4. Connect the USB drive to a USB port on your TV.
  5. Navigate to All Settings, and then select Support.
  6. Select Software Update, and then select Update Now.
  7. The TV will install the update and then restart.
  8. Once the TV restarts, press and hold the Power button on your remote until the TV turns off and back on.

    If the picture continues to freeze after the firmware update, please contact us.
Read less

The TV screen is too bright

If the screen on your Neo QLED TV appears to be just a little too bright, there are a few things you can do.


  1. Adjust the brightness level on the TV.

    The brightness level can be adjusted from 0-50. Navigate to All Settings, then select Picture, then select Expert Settings, and then select Brightness. Turn the brightness up or down until you are happy with the way it looks.
  2. Enable Intelligent Mode.

    Intelligent Mode will adjust the brightness automatically depending on the content being displayed. Navigate to All Settings, then select General & Privacy, and then select Intelligent Mode Settings. Select Intelligent Mode to enable it.
  3. Try a different Picture Mode.

    Change the picture mode to a different option to check if the brightness looks more appealing. Navigate to All Settings, then select Picture, and then select Picture Mode.
Read less

Lines or colorful dots appear on the screen

  1. Run a Picture Test.
    • On 2022 and later TV models: Navigate to All Settings, then select Support, then select Device Care, and then select Self Diagnosis. Select Picture Test, select OK, and then view the test. You can select Yes if the picture looks normal, No if there is a problem with the picture, or Show again to see the picture a second time.
    • On previous TV models: Navigate to Settings, select Support, and then select Self Diagnosis. Select Picture Test, and then follow the on-screen directions.
      Picture Test highlighted on a Samsung TV
  2. Determine if lines are appearing during the Picture Test.

    Look for a line or lines on the screen during the test. If there are no lines, this means your TV is working fine. To identify and fix the issue, first try replacing the cable of the external device that is showing lines.

    If the lines still appear after replacing the cable, troubleshoot the external device.

    If lines appear during the test, proceed to the next step.
  3. Request service if lines appear during the Picture Test.

    If you see lines during the picture test, please visit our Support Center to request service. Make sure you have the TV's model code, software version, and serial number when calling.

    In some cases, lines (especially if they are black) can be caused by a cracked screen. If this is the case, it would still require service if you want to fix it. However, since physical damage is not covered by the warranty, it may be more economical to buy a new TV rather than pay for repairs and a new screen.
Read less

TV picture is flickering

  1. Run a Picture Test.
    • On 2022 and later TV models: Navigate to All Settings, then select Support, then select Device Care, and then select Self Diagnosis. Select Picture Test, select OK, and then view the test. You can select Yes if the picture looks normal, No if there is a problem with the picture, or Show again to see the picture a second time.
    • On previous TV models: Navigate to Settings, select Support, and then select Self Diagnosis. Select Picture Test, and then follow the on-screen directions.

      If the picture is flickering in the picture test, visit the Support Center to request service. Make sure you have the TV's model code, software version, and serial number when calling.

      Self Diagnosis selected on a Samsung TV
  2. Enable or disable the Eco Solution settings.

    The Eco Solution, or energy saving features, will adjust the screen based on how bright it is and how bright your room is. If there are a lot of scene changes between light and dark or if your room has sudden lighting changes, the TV may appear to be flickering as it adjusts the brightness or darkness.

    To find these features on 2021 TV models, navigate to All Settings, and then select General. Select Eco Solution and enable or disable your preferred option:
    • Ambient Light Detection: Adjust the brightness based on the ambient light level.
    • Power Saving Mode: Reduce power consumption by adjusting the brightness settings.
    • Motion Lighting: Reduce power consumption using motion-sensitive brightness controls.

      To find this feature on previous TV models, navigate to Settings, and then select General. Look for either Energy Saving or Eco Solution and set the option to Off.

      If you are having trouble finding this feature on your TV, please consult the user manual.

      If the flickering is still present, then the brightness was not the issue.
  3. Test the HDMI cable.

    Important: Certain models only have an HDMI test after receiving a software update, and older models may not have it at all. If your model does not have this test or is not connected by HDMI, skip to the next step.

    Some TVs have an HDMI cable test. The test is designed for HDMI cables less than 2m long and may not produce good results on longer cords.
    • On 2022 and later TV models: To perform the test, navigate to All Settings, then select Support, then select Device Care, and then select Self Diagnosis. Select HDMI Troubleshooting. Select the HDMI connection you'd like to test, and then follow the instructions on the TV.
    • On previous TV models: To perform the test, make sure the TV's source is still on the HDMI setting for the cable you want to test, and then navigate to Settings. Select Support, select Self Diagnosis, and then select Signal Information. Select HDMI Cable Test, and then select Start Test.

      If the test says there is an issue with the cable, replace the cable. Service is not required.
  4. Check other devices on the circuit for grounding issues.

    The electrical wiring in your wall has enough power going through it that disruptions can actually affect your TV's image quality, most frequently through flickering.

    To rule out grounding issues, unplug all other devices plugged into the same circuit as the TV; this may include more than just one power outlet depending on how your house is wired.

    With the TV on its own circuit, try playing a video from an internal source, like an app or USB drive.
    • If the flickering happens even when the TV is on its own circuit, visit the Support Center to request service.
    • If the flickering stops, plug your devices back in one at a time and check which one is causing the flickering. If one of the devices is the cause of the issue, it may have bad grounding.
  5. Turn off LED Clear Motion on 2018 QLED TVs.

    We have identified an issue with 2018 QLED TVs running software version 1270.6, which causes flickering when LED Clear Motion is enabled.

    If you have a 2018 QLED TV, please turn off this setting until a software update is available. Navigate to Settings, select Picture, and then select Expert Settings. Select Auto Motion Plus Settings, and then select Auto Motion Plus. Select Custom, and then select LED Clear Motion.
  6. Request service.

    If you have completed all of the previous steps, but your TV's picture is still flickering, visit the Support Center to request service.
Read less

TV color looks off when using component cables

  1. Run a Picture Test.
    • On 2022 and later TV models: Navigate to All Settings, then select Support, then select Device Care, and then select Self Diagnosis. Select Picture Test, select OK, and then view the test. You can select Yes if the picture looks normal, No if there is a problem with the picture, or Show again to see the picture a second time.
    • On previous TV models: Navigate to Settings, select Support, and then select Self Diagnosis. Select Picture Test, and then follow the on-screen directions.

      If the colors are not correct in the picture test, visit the Support Center to request service.
  2. Disconnect the component cables from the TV and external device, and then plug them back into the external device.

    If the cable has multiple connections on the external device, make sure the green (Y), blue (Pb), and red (Pr) cables are firmly connected to their correct ports.

    Note: Make sure to insert the red cable into the red (Pr) video input and not the R audio input, which is also red.
  3. Connect the green cable to the TV.

    Connect the green cable to the green component jack (Y) on the TV. An image that is black and white should display.

    If a black and white image cannot be seen, make sure the external device is turned on and the TV is set to the correct source. If the black and white image still does not display, skip to Step 6.
    Black and white example image
  4. Connect either the blue or red cable to the TV.

    Connect either the blue cable to the blue component jack (Pb) or the red cable to the red component jack (Pr) on the TV. If the blue cable is connected, the TV should display an off-color image with bluish hues, and if the red cable is connected, the TV should display an off-color image with reddish hues.

    If the cable does not add color to the picture, skip to Step 6.

    Note: When inserting the red cable, make sure to insert it into the red (Pr) video input and not the R audio input, which is also red.Blue Hues and Red Hues
  5. Connect the final cable to the TV.

    Connect the final cable to the remaining component jack on the TV. The picture's colors should now be correct. If so, you're good to go and no further steps are needed.

    Note: When inserting the red cable, make sure to insert it into the red (Pr) video input and not the R audio input, which is also red.Full color example image

  6. Try connecting the external device with the same component cable to a different component input or on a different TV.

    If the cable and the device display colors correctly on a different component input or TV, visit our Support Center to request service for the original TV.

    If the colors still do not display correctly, either the cable or the external device is at fault. First try replacing the cable. If the colors still do not display correctly, then the external device is the source of the issue.
Read less

Part of the TV screen is black

Note
If your entire TV screen is black, you can also troubleshoot a TV with no picture or a black screen.
  1. Navigate to the menu on your TV.

    If the menu is cut off by the black part of the screen, visit the Support Center to request service.

    If the menu displays completely, there is nothing wrong with the TV, and service is not required. The following steps will help you identify if an external device or cable is causing the issue.
  2. Test the HDMI cable.

    Important: Certain models only have an HDMI test after receiving a software update, and older models may not have it at all. If your model does not have this test or is not connected by HDMI, skip to the next step.

    Some TVs have an HDMI cable test. The test is designed for HDMI cables less than 2m long and may not produce good results on longer cords.
    • On 2022 and later TV models: To perform the test, navigate to All Settings, then select Support, then select Device Care, and then select Self Diagnosis. Select HDMI Troubleshooting. Select the HDMI connection you'd like to test, and then follow the instructions on the TV.
    • On previous TV models: To perform the test, make sure the TV's source is still on the HDMI setting for the cable you want to test, and then navigate to Settings. Select Support, select Self Diagnosis, and then select Signal Information. Select HDMI Cable Test, and then select Start Test.

      If the test says there is an issue with the cable, replace the cable. Service is not required.Self Diagnosis selected on a Samsung TV
  3. Test different external devices.

    The final thing to rule out is the external device you're using. Try connecting a different device or using a different Source port. If you were unable to test the HDMI cable in the previous step, try switching out the HDMI cable for another one that is working.

    If the TV can display a picture in any other setup, then the TV is not the cause of the issue. Keep trying various setups until you identify the device or cable that is not working, and then either troubleshoot or replace that particular device or cable.
  4. Run a Picture Test.
    • On 2022 and later TV models: Navigate to All Settings, then select Support, then select Device Care, and then select Self Diagnosis. Select Picture Test, select OK, and then view the test. You can select Yes if the picture looks normal, No if there is a problem with the picture, or Show again to see the picture a second time.
    • On previous TV models: Navigate to Settings, select Support, and then select Self Diagnosis. Select Picture Test, and then follow the on-screen directions.

      If the picture is flickering in the picture test, visit the Support Center to request service. Make sure you have the TV's model code, software version, and serial number when calling.
      Self Diagnosis selected on a Samsung TV
      If the issue does not appear in the picture test, review the previous steps to correct the issue as it is being caused by a bad cable or a connected device.
Read less
Was this content helpful?
We're here for you

Contact Samsung Support

Contact us online through chat and get support from an expert on your computer, mobile device or tablet. Support is also available on your mobile device through the Samsung Members App.
auto-contact_us-pc-2x auto-contact_us-pc-2x