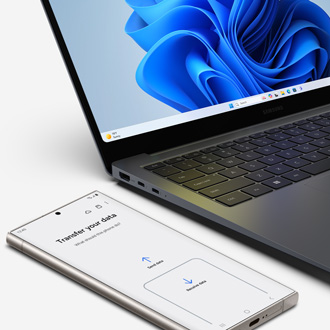
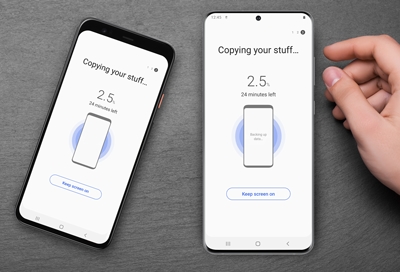
Transfer data to a new phone using Smart Switch for Windows or Mac

Transfer data to a new phone using Smart Switch for Windows or Mac
Install Smart Switch on your compatible device
Whether you're using a Windows PC or a Mac, you can download Smart Switch for your computer from the Smart Switch page. You can also find links there to install Smart Switch on your mobile device. Be sure you have installed Smart Switch on both your computer and mobile device before you get started.
Note: Chromebooks are not compatible with Smart Switch.
- Android Requirements: Android 4.3 or higher is required for general transfers. To transfer encrypted data, you must have Android 7.0 or higher.
To find the software version on your device, navigate to and open Settings. Tap About phone or About tablet, and then tap Software information. - iOS Requirements: For cable transfers, you must have iOS 5 or higher. To transfer using Wi-Fi, you must have iOS 12 or higher.
To find the software version on your device, navigate to and open Settings. Tap General, and then tap About. - Mac Requirements: MacOS 10.9 or later.
To find the version of MacOS your computer is running, open the Apple menu in the top-left corner of the screen, and then select About This Mac. - Windows Requirements: Windows 10 or later.
To find the version of Windows your computer is running, click the Start menu in the bottom left corner, and then click the Settings icon. Select System, and then click About.
Note: If Microsoft Media Feature Pack is not installed on your PC, download it here.
Content that can be transferred
Although different content and file types can be seamlessly transferred using Smart Switch, only certain file formats are supported and not all items can be backed up.
Note: Not all file types that can be transferred are readable on a PC. For example, messages cannot be viewed on your PC from the back up file, but they can be read once transferred to the new phone. Photos, videos, and audio files may be readable from a PC.
From Android:
Contacts
Schedule
Messages
Memos/voice memos (from Galaxy devices only)
Photos and videos
Music
Alarm settings
Call log
Home/lock screen settings and layout (from Galaxy devices only)
Documents
Email settings (from Galaxy devices only)
Settings (from Galaxy devices only)
Apps
App data (from Galaxy devices only)
From iOS using OTG USB:
Contacts
Schedule
Messages
Notes
Call history
Bookmarks
Photos & videos
Documents
Recommended Apps
Voice Memos
Wi-Fi settings
Alarm settings
Note: Only music and video files purchased from iTunes after 2009 can be transferred. Any music files purchased prior to 2009 are not DRM-free and cannot be transferred.
Supported multimedia file formats:
- Videos: mpg, mpeg, avi, divx, svi, wmv, asf, pyv, mp4, m4v, 3gp, rm, rmvb, mov, mkv, skm, k3g, flv, and swf.
- Music: mp3, wma, wav, pya, ogg, m4a, aac, 3ga, flac, smp, dcf, mid, midi, amr, qcp, and imy.
- Images: bmp, wbmp, gif, jpg, jpeg, png, tif, and tiff.
- Documents: pdf, ppt, doc, docx, pptx, xls, xlsx, hwp, csv, txt, and xml.
Note: Files must be DRM-free to transfer.
Content that cannot be transferred:
Contacts: Contacts saved on the SIM card, social networks (Facebook, Twitter, etc.), Google accounts, and work email accounts are excluded.
Calendar: Appointments synced with external accounts, such as Google, and calendar stickers are excluded.
App data: Data saved in private storage cannot be backed up.
Email: Social Hub and Premium accounts (Push email) are excluded.
Live wallpapers and themes: Live wallpapers and themes are excluded. You can reinstall these from the Galaxy Store.
Create and save a backup file on your PC
Check the storage space on your computer:
Backup files can take up a lot of space. Before you transfer backed up date from your phone onto your PC, make sure you have enough storage for the file.
- Windows: Click the Start menu in the bottom left corner of the screen, and then click the Settings icon. Select System, and then click Storage.
- Mac: Open the Apple menu in the top-left corner of the screen, and then select System Settings. Select General, and then select Storage.
- Connect your device to your computer using a USB cable, and then tap Allow on your phone.
- Next, navigate to and open Smart Switch on your computer, and then click Backup.
- A list of different data categories (Call and contacts, messages, apps, etc.) you can back up will display.
- "Select all" is the default option, but you can deselect some items if you'd like. Clicking on a category will allow to select specific items in that category. Select Backup when you are ready.
- Your computer will start backing up your data, which may take several minutes. When it's done, a screen will appear informing you it's complete. Select OK.
Locate the backup file on your PC:
- Windows 10: C:\Users\[username]\Documents\Samsung\SmartSwitch
- Windows 11: C:\Users\[username]\AppData\Roaming\Samsung\SmartSwitchPCtoPC
- Mac OS X: /Users/[username]/Documents/Samsung/SmartSwitch/backup
If you created multiple backups, be sure to delete the previous copies you no longer need. Just navigate to the location where the folder named SmartSwitch is stored, and then delete the backup. Be sure to empty the Recycle Bin or Trash on your computer as well to fully delete the file(s).
Transfer content from your PC to a phone
Before you start transferring data, make sure the file types are supported by Smart Switch on Windows or Mac. Also make sure the device is charged to avoid the data transfer being interrupted. Follow these steps to transfer the backup file from your PC to your phone.
- First, you may turn off or temporarily disable your firewall, anti-virus, anti-spyware, anti-malware, and other security tools on your PC so all your files can transfer.
- Open Smart Switch on your computer. When prompted, connect your phone to the computer using the USB cable. Once it's connected, the Smart Switch screen will appear.
- On your computer, click Restore and, if desired, click Select your backup data to choose specific data to restore.
- When you're ready, click Restore now. Once restoration is complete, click OK.
Note: You may need to allow permissions on your phone or tablet to complete the backup.
Once the transfer is complete, you can delete the previous backup data from your PC to free up storage space.
Sync with Outlook
Another way to get content from your computer onto a Galaxy phone or tablet is to sync data from the Outlook app on your computer. Syncing ensures you have the same content on your Windows PC or Mac and your mobile device.
Windows:
- Click Outlook Sync on the Smart Switch screen.
- If you are not already logged into your account, sign in with your Microsoft Outlook credentials.
- Next, click Sync Preferences for Outlook, select what you want to sync, and then click OK.
- Click Sync Now, and then click Confirm when finished.
Mac:
- Click Sync on the Smart Switch screen.
- Choose specific content to sync from your computer, and then click Sync Now.
- When syncing is complete, click Confirm.
Transfer issues or errors
If you are having trouble with your data transfer, check out our other help guides. Including how to transfer data from an unresponsive or cracked screen.


Contact Samsung Support


-
Mobile 8 AM - 12 AM EST 7 days a week
-
Home Electronics & Appliance 8 AM - 12 AM EST 7 days a week
-
IT/Computing 8 AM - 12 AM EST 7 days a week
-
Text Support 24 hours a day 7 days a week

You Are About To Be Redirected To Investor Relations Information for U.S.
Thank you for visiting Samsung U.S. Investor Relations. You will be redirected via a new browser window to the Samsung Global website for U.S. investor relations information.Redirect Notification
As of Nov. 1, 2017, the Samsung Electronics Co., Ltd. printer business and its related affiliates were transferred to HP Inc.For more information, please visit HP's website: http://www.hp.com/go/samsung
- * For Samsung Supplies information go to: www.hp.com/go/samsungsupplies
- * For S.T.A.R. Program cartridge return & recycling go to: www.hp.com/go/suppliesrecycling
- * For Samsung printer support or service go to: www.hp.com/support/samsung
Select CONTINUE to visit HP's website.
